
Tips for preserving garden surplus to reduce food waste

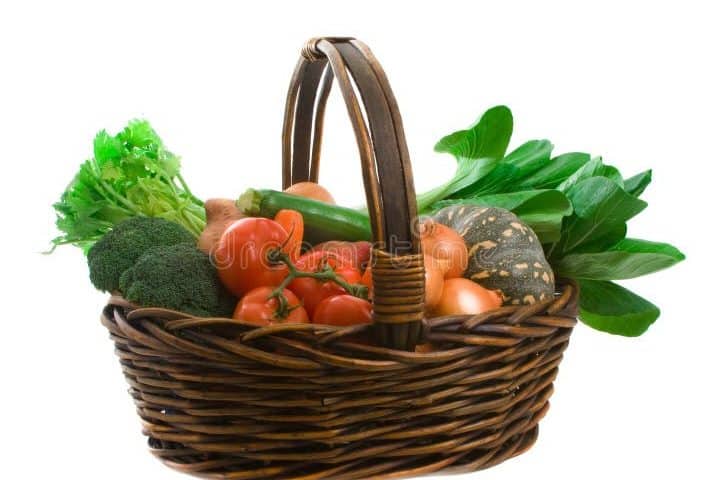
Having a **flourishing** garden is a rewarding experience, but it can also lead to a **surplus** of fruits and vegetables that may go to waste if not properly preserved. Food waste is a major environmental issue, contributing to **greenhouse gas emissions** and wasting valuable resources. Fortunately, there are several methods you can use to **preserve** your garden surplus and extend the **shelf life** of your produce.
In this blog post, we will discuss some effective tips for **preserving** garden surplus to reduce **food waste**. We will explore different preservation methods such as **canning**, **freezing**, **dehydrating**, and **pickling**. Additionally, we will provide step-by-step instructions and helpful tips for each method, including the best types of produce to preserve using each technique. By following these tips, you can enjoy the **fruits** of your labor throughout the year and contribute to a more sustainable food system.
Freeze excess fruits and vegetables
Freezing excess fruits and vegetables is a great way to preserve them and reduce food waste. Here are some tips to help you freeze your garden surplus:
1. Wash and prepare the produce:
Start by washing your fruits and vegetables thoroughly to remove any dirt or debris. Then, peel and chop them into desired sizes or shapes.
2. Blanch the produce:
Blanching is a quick cooking process that helps to preserve the color, texture, and flavor of the produce. Bring a pot of water to a boil and blanch the fruits or vegetables for a short period of time (usually 1-2 minutes). Immediately transfer them to an ice bath to stop the cooking process.
3. Package and label:
Divide your blanched produce into portion sizes that you will use in the future. Place them in airtight containers, leaving some space for expansion. Don't forget to label the containers with the name of the produce and the date of freezing.
4. Freeze:
Place the containers in the freezer and make sure they are arranged in an organized manner. It's best to freeze them flat initially, and once they are solid, you can stack them to save space.
5. Use within recommended time:
Each fruit or vegetable has a recommended time for storage. Refer to reliable sources or guides to know how long you can keep them frozen without compromising quality. Typically, most frozen produce can be stored for 8-12 months.
6. Thaw properly:
When you're ready to use your frozen produce, thaw them properly to retain their texture and flavor. The safest way to thaw is to transfer them to the refrigerator and let them thaw slowly overnight. Alternatively, you can also use a microwave or cold water bath for faster thawing.
By following these tips, you can enjoy the flavors of your garden surplus all year round and reduce food waste in the process. Happy freezing!
Make homemade jams and preserves
Homemade jams and preserves are a great way to make the most out of your garden surplus and reduce food waste. Here are some tips to help you get started:
1. Choose your fruits and vegetables wisely
Select ripe and fresh produce from your garden to ensure the best flavor in your jams and preserves. Avoid using overripe or damaged fruits and vegetables, as they may affect the quality of the final product.
2. Wash and prepare the produce
Thoroughly wash the fruits and vegetables to remove any dirt and debris. Remove any stems, pits, or seeds, and chop or dice them into smaller pieces if necessary.
3. Use a trusted recipe
Find a reliable recipe for the specific type of jam or preserve you want to make. This will ensure that you have the right proportions of ingredients and the correct cooking instructions. Following a trusted recipe will also help you achieve the desired texture and flavor.
4. Sterilize your jars
Prior to filling your jars with the homemade jam or preserve, make sure to sterilize them. This can be done by boiling the jars and lids in a large pot of water for a few minutes. Sterilizing the jars will help prevent any bacteria from contaminating your preserves and extend their shelf life.
5. Cook the jam or preserve
Follow the recipe instructions to cook the jam or preserve. This typically involves combining the prepared fruits or vegetables with sugar, lemon juice, and sometimes pectin. Cook the mixture over medium heat until it thickens and reaches the desired consistency.
6. Fill and seal the jars
While the jam or preserve is still hot, carefully ladle it into the sterilized jars, leaving a small amount of headspace. Wipe the rims of the jars with a clean, damp cloth to remove any spills or residue. Place the lids on the jars and tighten them securely.
7. Process the jars (optional)
If you want to extend the shelf life of your homemade jams and preserves, you can process the filled jars in a water bath canner. This involves submerging the jars in boiling water for a specific amount of time to create a vacuum seal. Follow a trusted canning guide for the correct processing time based on your recipe and altitude.
 What is soil health and why is it important for a sustainable world?
8. Store and enjoy!
Once the jars have cooled completely, check to make sure they are properly sealed. Store the jars in a cool, dark place, such as a pantry or cellar. Homemade jams and preserves can last for several months to a year when stored correctly. Enjoy your delicious homemade creations on toast, in pastries, or as a sweet accompaniment to cheese or yogurt.
Dry herbs for future use
Preserving herbs is a great way to extend their shelf life and have them available for future use. Here are some tips on how to dry herbs:
1. Harvesting the herbs
Start by harvesting the herbs at their peak, preferably in the morning after the dew has dried. Choose healthy, vibrant leaves and discard any damaged or discolored ones.
2. Cleaning the herbs
Gently rinse the herbs under cool water to remove any dirt or insects. Pat them dry with a clean towel or use a salad spinner to remove excess moisture.
3. Bundling the herbs
Gather a small bunch of herbs and tie them together at the stems with kitchen twine or a rubber band. Make sure the bundle isn't too thick, as this can prevent proper airflow and cause the herbs to mold.
4. Hanging the herbs
Hang the herb bundles upside down in a cool, dry, and well-ventilated area. This could be a pantry, a closet, or a designated drying area. Ensure that the herbs are not exposed to direct sunlight, as this can cause them to lose their color and flavor.
5. Drying time
Depending on the herb, drying can take anywhere from a few days to a couple of weeks. The herbs should be completely dry and brittle to the touch before storing them.
6. Storing the dried herbs
Once the herbs are dry, remove the leaves from the stems and store them in airtight containers, such as glass jars or resealable bags. Label the containers with the herb's name and the date of drying to keep track of freshness.
7. Using the dried herbs
Dried herbs can be added to various dishes, including soups, stews, sauces, and marinades. Remember that dried herbs are more potent than fresh ones, so adjust the quantities accordingly.
By following these tips, you can enjoy the flavors of your garden surplus throughout the year and reduce food waste.
Can or pickle surplus produce
Preserving garden surplus is a great way to reduce food waste and enjoy the fruits of your labor all year round. One popular method is canning or pickling the excess produce. This process involves preserving the fruits and vegetables in a brine or vinegar solution, preventing spoilage and extending their shelf life.
Canning:
Canning is a method of preserving food in which the produce is packed into sterilized jars and heated to destroy bacteria and enzymes that can cause spoilage. Here's how you can can your surplus produce:
- Start by gathering your canning supplies, including jars, lids, and a canning pot.
- Wash and sterilize the jars and lids in boiling water or a dishwasher.
- Prepare your produce by washing, peeling, and cutting it into desired sizes.
- Fill the jars with the prepared produce, leaving appropriate headspace.
- Prepare a canning liquid, such as a syrup or brine, and pour it over the produce, ensuring all air bubbles are removed.
- Wipe the rims of the jars, place the lids on top, and tighten the rings.
- Process the jars in a boiling water bath for the required amount of time.
- Remove the jars from the pot and let them cool before checking for a proper seal.
- Store the sealed jars in a cool, dark place for future use.
Pickling:
Pickling is another popular method for preserving surplus produce. It involves immersing the fruits or vegetables in a vinegar-based solution, which not only imparts a tangy flavor but also helps to preserve them. Here's a simple pickling process:
- Choose the produce you want to pickle, such as cucumbers, peppers, or green beans.
- Wash and prepare the produce by slicing or cutting it into desired shapes.
- Prepare a pickling solution by combining vinegar, water, salt, sugar, and spices in a pot.
- Bring the solution to a boil, ensuring the salt and sugar are dissolved.
- Place the prepared produce in clean, sterilized jars.
- Pour the hot pickling solution over the produce, leaving appropriate headspace.
- Remove any air bubbles and wipe the rims of the jars.
- Seal the jars with lids and rings, ensuring they are tightened.
- Store the jars in a cool, dark place for a few weeks to allow the flavors to develop.
- Your pickled produce will be ready to enjoy!
By canning or pickling your surplus produce, you can not only reduce food waste but also have tasty preserved goods that can be enjoyed throughout the year. So don't let your garden surplus go to waste, try these preservation methods and savor the flavors of your hard work!
Share with friends and neighbors
Sharing your garden surplus with friends and neighbors is a fantastic way to reduce food waste and build stronger community connections. Here are some tips to make the most of this practice:
1. Start a neighborhood produce swap:
Organize a regular event where gardeners in your neighborhood can gather and exchange their excess produce. This allows everyone to diversify their harvest and avoid waste. Create a schedule and location for the swap, and encourage participants to bring their own bags or baskets.
2. Set up a sharing table:
If you have a surplus of produce but don't have the time or energy to organize a formal swap, consider setting up a sharing table in your front yard or community space. Place any extra fruits, vegetables, or herbs on the table for others to take for free. Make sure to clearly label the items and provide bags or baskets for people to carry them.
3. Create a neighborhood food sharing group:
Form a group with your friends and neighbors who are interested in reducing food waste. Use online platforms or social media to coordinate the sharing and trading of surplus produce. This allows for ongoing communication and makes it easier to connect with others who have similar interests.
 The basic principles of permaculture and how they contribute to soil health
4. Preserve and share:
If you have the time and skills, consider preserving your garden surplus for later use. Canning, pickling, freezing, or drying fruits and vegetables can extend their shelf life and allow you to share them with others throughout the year. You can also share your preserved goods as gifts or donations to local food banks or community organizations.
5. Offer to trade:
If you have specific preferences or dietary restrictions, offer to trade your surplus produce with others who have different items. This way, you can still reduce food waste while ensuring you receive produce that you will enjoy and use. Communication is key to finding suitable trade partners.
By sharing your garden surplus with friends and neighbors, you not only reduce food waste but also foster a sense of community and connection. Plus, you get to enjoy the satisfaction of knowing that your hard work in the garden is benefitting others as well.
Donate to local food banks
Donate to local food banks.
One great way to reduce food waste and help those in need is by donating your garden surplus to local food banks. Food banks play a crucial role in providing food to individuals and families who are experiencing food insecurity. By donating your excess produce, you can ensure that it doesn't go to waste and instead goes to those who need it the most.
When donating to food banks, it's important to keep a few things in mind:
1. Check with your local food bank
Before making a donation, reach out to your local food bank to find out what types of produce they accept and any specific guidelines they may have. Some food banks only accept fresh fruits and vegetables, while others may also accept canned or frozen produce. It's always best to check beforehand to ensure your donation will be accepted and put to good use.
2. Harvest and handle with care
When harvesting your garden surplus, make sure to handle the produce gently to avoid bruising or damaging it. This will help ensure that the food remains fresh and appealing for those who will receive it. Additionally, be sure to wash the produce thoroughly before donating it to remove any dirt or debris.
3. Sort and package properly
Sort your donated produce to separate any damaged or overripe items from the rest. This will help ensure that only high-quality produce is donated. Package the produce in sturdy containers or boxes to prevent it from getting damaged during transportation.
4. Consider timing and quantity
When donating to food banks, it's helpful to consider the timing and quantity of your donations. Instead of donating all your surplus at once, consider making smaller and regular donations throughout the growing season. This will help ensure a steady supply of fresh produce for the food bank and prevent overwhelming them with a large amount all at once.
By following these tips, you can make a meaningful impact in reducing food waste and helping those who are food insecure. Remember, every little bit counts, and your garden surplus can make a big difference in someone's life.
Compost any scraps or leftovers
Composting is a great way to reduce food waste and nourish your garden at the same time. Instead of throwing away any scraps or leftovers, why not turn them into nutrient-rich compost for your plants?
To get started, find a compost bin or create your own compost pile in your garden. You can add any fruit and vegetable peels, coffee grounds, eggshells, and yard waste to your compost. Avoid adding meat, dairy, and oily foods, as they can attract pests.
Make sure to turn your compost regularly to aerate it and speed up the decomposition process. Over time, your compost will break down into dark, crumbly soil that you can use to fertilize your garden.
Not only does composting help reduce food waste, but it also reduces the need for chemical fertilizers and improves soil health.
Frequently Asked Questions
1. What is food waste?
Food waste refers to any food that is discarded or uneaten, resulting in the loss of resources used to produce it.
2. How can I reduce food waste in my garden?
You can reduce food waste in your garden by planning your planting, harvesting only what you need, and preserving surplus produce.
3. What are some methods for preserving garden surplus?
Some methods for preserving garden surplus include canning, freezing, dehydrating, and fermenting.
4. Why is it important to preserve garden surplus?
Preserving garden surplus helps to reduce food waste, save money, and ensure a supply of fresh produce throughout the year.
 Exploring natural methods to control pests and diseases in the garden
Deja una respuesta
Entradas relacionadas: